
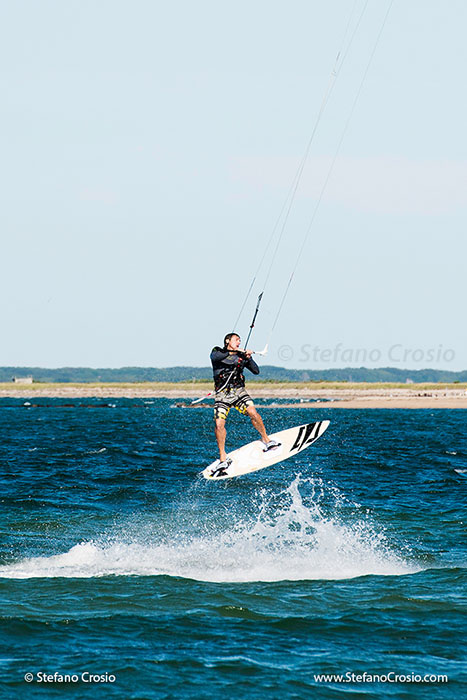
Nikon D800, Nikkor AF-S 70-200 f/2.8G VR II; 1/1600 sec @ f/5.6, ISO 250
After my previous post about how to effectively customize a Nikon D800 so as to make it work the way you want/need, a question from a reader prompted me to write again about the D800 and explain why I think that, if properly configured, the D800 is a dream camera (at least in the Nikon camp) and a star performer not only for photographing still subjects but also action.
Let’s start from a few basic facts: the D800 has a so-called “FX” format full-frame CMOS sensor, capable of recording images at the stunning resolution of 36MP in the traditional 35mm format of 24×36. At this resolution, the D800 resolves much more detail than any “legacy” 35mm film-based camera and approaches medium-format territory. The flip side of such phenomenal resolution is that, given the huge amount of data that the camera needs to move from the sensor to the flash card, at maximum resolution the D800 achieves a relatively slow continuous shooting speed of 4 FPS (frames per second). In addition, if you are shooting NEF (i.e., RAW files – which I think you should for the reasons explained on a previous post), even with a fast CF card the buffer would fill after about 17 consecutive shots (using the “14-bit lossless compressed” NEF setting).
While of course the above limitations are not a concern if/when you shoot stationary subjects, they will most likely get in the way if you plan to also use your D800 to shoot action.

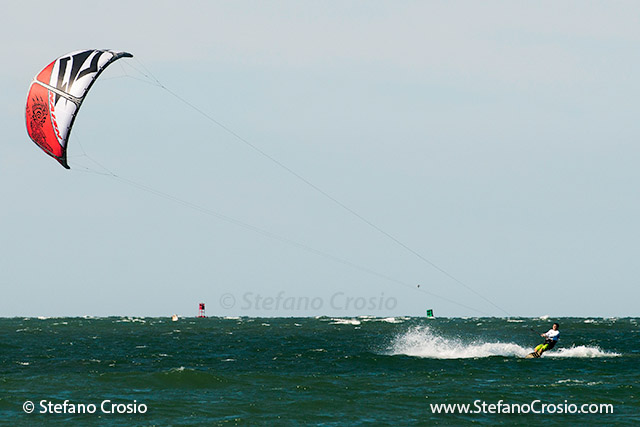
Nikon D800, Nikkor AF-S 70-200 f/2.8G VR II; 1/1600 sec @ f/5.6, ISO 250
So, is all hope lost and do you need to resign yourself (as many have lamented on the World Wide Web) to choose the D800 if you shoot landscapes/portraiture/architecture OR the D4 if you shoot sports or active wildlife?…
The short answer is: not really.
Let me explain why. Your D800 could be compared to a Swiss Army knife: if you have the corkscrew tool out, your versatile knife will let you pop a bottle nice and easy, but will it be as effective a tool to, say, cut an unplugged electrical wire? Of course not: to do that you will have to switch to the appropriate tool for the job, a blade.
Much the same way, Nikon engineers did not pack all that unbelievable technology in the D800 for no reason: you need to configure your camera so as to maximize its capabilities of shooting action.

Nikon D800, Nikkor AF-S 70-200 f/2.8G VR II; 1/1600 sec @ f/5.6, ISO 200
Let’s see what I think you should do:
- Set the AF Mode to AF-C (Continuous Servo AF) and the Release Mode to CH (Continuous Shooting – High Speed)
* - If you shoot NEF (as you should), set your compression to “14-bit Lossless Compressed”
* - Set the Image Area function to the DX (24×16) format
* - Use a fast CF (or SD) Card! For best results, get an UDMA 7 card, such as Lexar Professional 1000x or SanDisk Extreme Pro UDMA 7
* - Purchase the optional MB-D12 external battery grip (note that the street price for it in the US is almost 50% less than what Nikon USA charges) and a D4 battery (EN-EL18) and connect them to your D800

Nikon D800, Nikkor AF-S 70-200 f/2.8G VR II; 1/1600 sec @ f/5.6, ISO 250
That’s it! By configuring your camera as above, you achieve the following benefits for action photography:
- You maximize the D800 “base” 4 FPS rate, by increasing it by 50% to 6 FPS, which is adequate for most action shooting scenarios, barring only those involving extremely fast moving subjects (such as if you professionally shoot F1/NASCAR/MotoGP)
* - You increase the number of images that can be saved to the buffer before this fills up by 70%, from 17 to 29, depending on how fast your memory card is
* - Although by switching to the DX image format you reduce the file size from 36MP to 15MP, your image size is still going to be plenty enough to print even large photographs or to submit to agencies/magazines
* - By switching to the DX image format, you get the “1.5x magnification” effect typical of such format, which effectively adds 50% to the focal length of your long lens, something desirable for most action shooters who, no matter how long a lens they are shooting with, often find themselves hoping it were even longer! (A technical note: technically speaking, it is incorrect to call such effect a “magnification” as by switching to DX there is no optical difference – what happens is that the file you get is just an in-camera crop of the center portion of your full-frame FX image. But in practical terms your image, at the reduced DX size, will be very similar to the image that you would get if you used a 50% longer lens at the larger FX size)
Nikon D800, Nikkor AF-S 70-200 f/2.8G VR II; 1/1600 sec @ f/5.6, ISO 250
Also, the accuracy of the D800’s Multi-CAM 3500FX autofocus sensor module and 15 cross-type AF sensors is phenomenal – it really nails down the focus on almost all images, so much so that you will soon come to realize that, if you have occasional out of focus shots, in most cases it is due to operator error, not inaccurate technology!
One final note: for your convenience, you may decide to assign one of the four customizable Shooting Menu Banks available on the D800 to your action shooting settings, so that you may recall them at any time with just one click. See page 268 of the D800 User Manual for instructions how to set it up.
Now have fun and go shoot some action with your Swiss Army knife D800! 🙂
Nikon D800, Nikkor AF-S 70-200 f/2.8G VR II; 1/1600 sec @ f/5.6, ISO 200

 Windows Arch at twilight")
 Balanced Rock at twilight")
